


Master the skill of growing your own Kombucha SCOBY, and then use it to brew your first batch of homemade Kombucha with this blog post!
Kombucha, the effervescent and tangy health drink made from fermenting sweet tea, has been enjoyed all over the world, for over 2000 years. At the heart of this fermentation process is a Symbiotic Culture Of Bacteria and Yeast, commonly known as a SCOBY ... photos of this magnificent beast can be seen here.
If you're looking to brew your own Kombucha, growing your own SCOBY using a bottle of live Kombucha is a great place to start, it is also a fascinating project to do with kids.
In this guide, we'll walk you through the simple steps needed to grow your very own SCOBY from scratch, and what to do with it once it's fully formed.
Understanding the Basics
Before getting started, it's important to understand what a SCOBY is and why it's essential for brewing kombucha.
SCOBY is an acronym for "Symbiotic Culture Of Bacteria and Yeast." This living, rubbery, pancake-like disk is what kickstarts the fermentation process when it comes to Kombucha.
The SCOBY consumes the sugars in the sweet tea, and turns them into organic acids. This gives Kombucha the slightly tart, lightly fizzy, delicious characteristics we love it for.

Choosing the Right Starter
To grow a SCOBY, you'll need a bottle of raw, totally natural, unpasteurised Kombucha.
It's crucial to choose a bottle that contains live cultures and is free from flavours, additives, or preservatives, as these can inhibit SCOBY growth.
Totally natural, raw, fresh plain Kombucha is your best bet! P.s. You could defo use one of ours!
Materials Needed
- 500ml raw, unpasteurised Kombucha
- 500ml boiled water
- 30 grams of white sugar
- 4 bags of black or green tea (or equivalent loose leaf)
- A clean measuring jug / saucepan to steep tea and allow to cool, and a clean spoon to stir
- A large clean glass jar (at least 1 Litre capacity)
- A breathable cloth (coffee filter, paper towel, or tightly woven fabric)
- A rubber band or string
- A warm, dark place to store the jar
Step-by-Step Guide to Growing a SCOBY
Step 1: Prepare the Sweet Tea
Begin by brewing your tea bags and sugar in 500ml of freshly boiled water in your measuring jug / saucepan. Stir until the sugar is dissolved and leave to one side cool to room temperature.
Step 2: Combine Tea and Kombucha
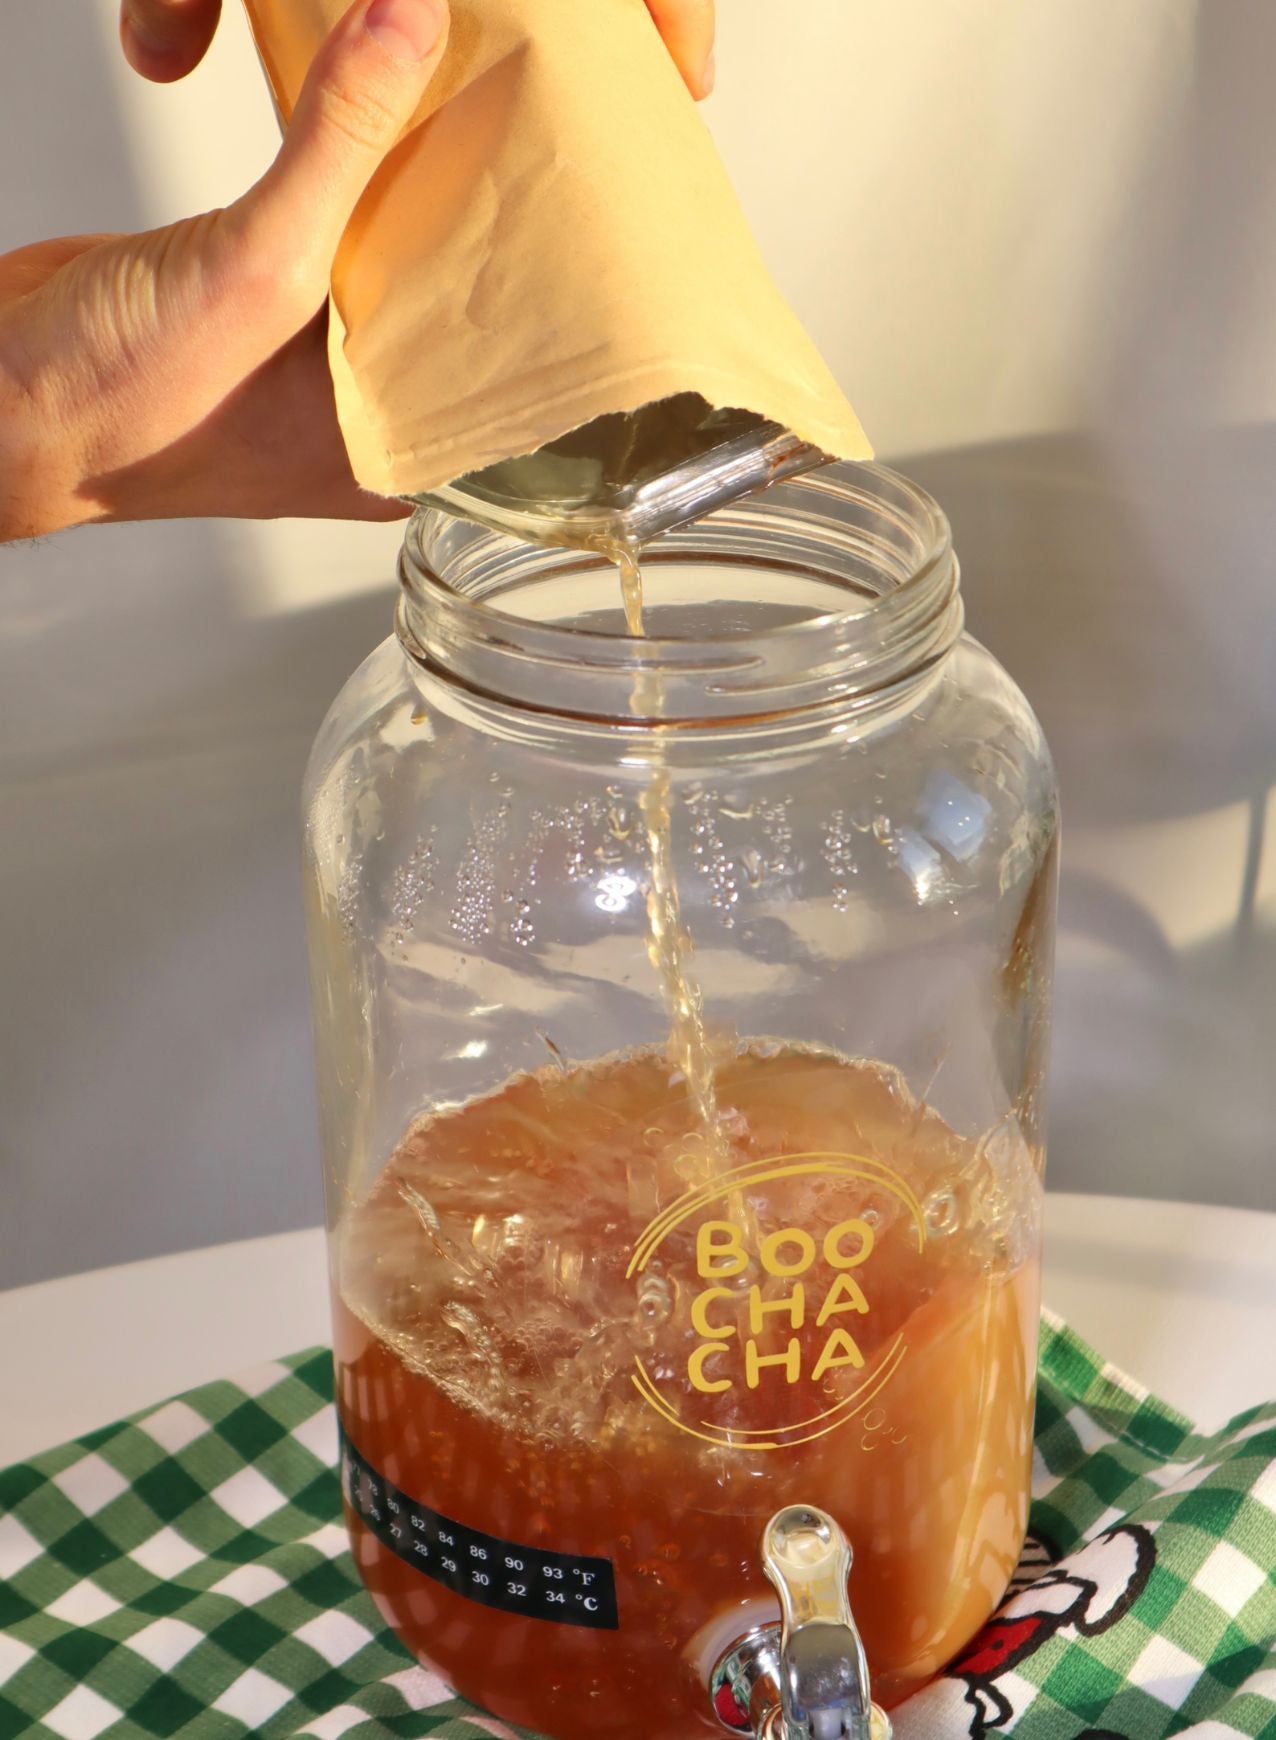
Remove the tea bags or strain the loose leaf tea from the cooled sweet tea. Pour the sweet tea into your clean glass jar. Then, open your bottle of Kombucha and pour it into the jar with the sweet tea. The kombucha acts as your starter culture, introducing the necessary bacteria and yeast to begin the fermentation process.
Step 3: Cover and Secure
Place the breathable cloth over the mouth of the jar to keep out contaminants like dust and insects while allowing air to flow. Secure the cloth with a rubber band or string. It's important that the cloth is tight enough to prevent any fruit flies or other pests or dust from getting into the sweet tea mixture.
Step 4: Store the Jar
Find a warm place to store your jar, where it's safe from knocks and wobbles. The ideal temperature for SCOBY growth is between 24°C to 29°C. Avoid placing the jar in direct sunlight or in areas with a lot of temperature fluctuation. The SCOBY will start to form quicker if the liquid remains undisturbed, so resist the temptation to keep peeping. Inside a pantry, airing cupboard or on a kitchen shelf away is usually a good spot.
Step 5: Wait and Observe
Now comes the hardest part: waiting. It can take anywhere from 2 to 4 weeks for your SCOBY to form. The time it takes to grow a SCOBY depends mostly on the temperature of the environment its kept in, and how still the jar is kept. Aim for 24°C to 29°C for this first stage.
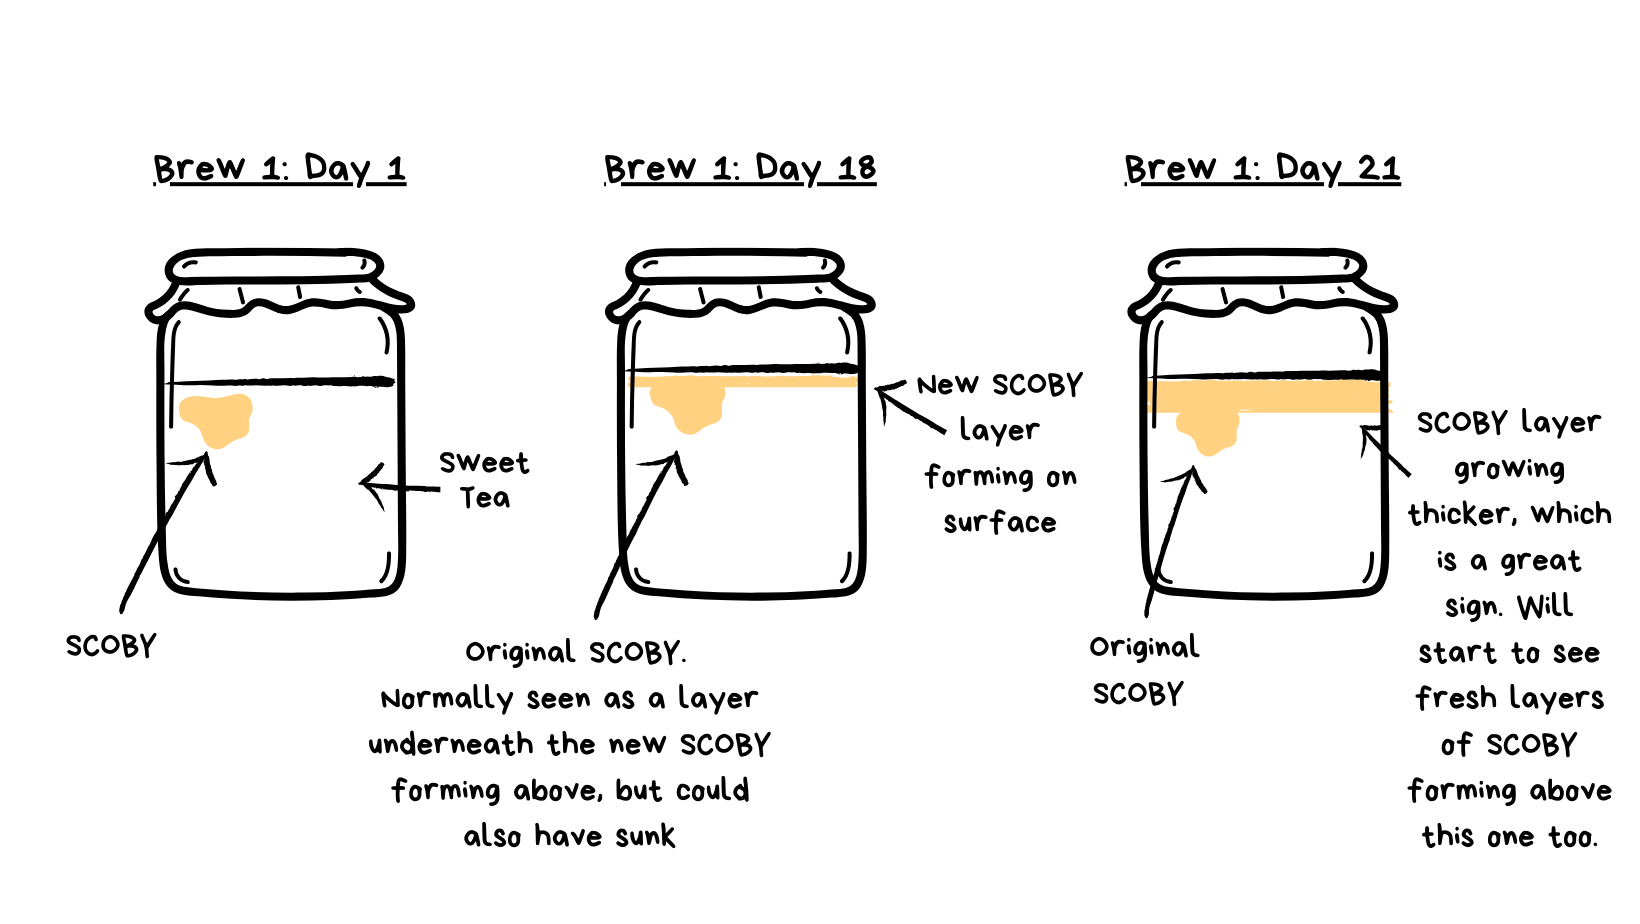
During this phase, you'll notice the liquid becoming cloudy, and a thin film will begin to form on the surface. This film is the baby SCOBY starting to develop. As days pass, it will thicken, and form a white, slimy pancake on the surface of the liquid. It should never look dry or fluffy, but may appear very patchy at first! Check out our SCOBY gallery here to see a range of good, bad, new and old SCOBY's.
Step 6: Check the SCOBY Growth
After about a week, check on the SCOBY's progress. You're looking for a creamy white, thick layer forming on the surface of the Kombucha. It should be between 10 - 20 mm thick before it can be used to brew your own Kombucha. If it's not thick enough, replace the cloth and let it continue to ferment.
Step 7: Time to Use Your SCOBY
Once your SCOBY has reached the desired thickness, it's time to set it to work. We always recommend brewing at home with the continuous Kombucha brewing method, and you can read more about what that is here.
You could also give batch brewing a go though, to see how you like the taste, and satisfaction of a kombucha home-brew, before committing to a continuous set up.
For both methods you'll need:
- 500ml of your starter liquid from your SCOBY jar
- a clean, 3 litre glass jar (with a tap if going for continuous)
- 1 litre boiled water
- 120 grams of white sugar
- 16 bags of green tea, or around 12 grams of loose
- breathable lid and band to fit over new, larger jar
To set the new kit up, you basically just follow along the method we used to grow the SCOBY, by brewing the tea, letting it cool, and adding it along with your new SCOBY and starter liquid left in the jar with the growing SCOBY.
If you can keep the temperature around 24 °C, then you should be able to have the first taste around day 7 (that's where the tap makes it SO much easier), and then keep tasting until it hits the right spot!
Once you've decided its at the perfect point for you, you can drain off most of the liquid into a glass bottle, and pop that in the fridge! Then, whilst you drink your daily serving from that each day, you refill the jar with sweet tea, and start the whole process again. Whilst you're waiting for that batch, you're drinking the previous one - it's a genius way to having a continuous supply of delicious, raw, fresh, and totally natural Kombucha!
And what's even better, is as your SCOBY ages, the Kombucha tastes better and better, so if you weren't WOWED by your first batch, give it some time, it will get better I promise!
If you're looking to master the art of kombucha brewing then look no further than our famous Kombucha Starter Kits, which include everything you need for the first month-ish of brewing. They're perfect for beginners, come with lifetime brewing support, easy to follow instructions and video instructions too!