

Are you brewing your own Kombucha at home, and wondering whether you can share the live culture of this easy-to-make, ancient, health tonic with friends and family?
Or perhaps you're the friend of a Kombucha home brewer, hoping to get in on the Kombucha action?
This blog will explain everything you need to know about both splitting an existing SCOBY, and then how to use some of it to create a healthy, thriving starter culture to give to a friend.
Or, if you already have a SCOBY, use our free guide on getting your Kombucha started here.
Our Kombucha Starter Kits are famous for helping beginners make perfect Kombucha, right from brew 1, so if you don't know anyone with a SCOBY to share, we have a starter kit for you!
What is a SCOBY, anyway?
For those who may be new to Kombucha, a SCOBY (Symbiotic Culture of Bacteria and Yeasts, see our SCOBY Gallery here) is a living, gelatinous, jelly-like-disc that feeds on the sugar used (in the sweet tea solution) to make authentic Kombucha.
The sweet tea is mixed with the SCOBY, and the fermentation of the sugar turns the sweet tea into Kombucha; an ancient, natural health tonic that's rich in probiotics, antioxidants, and other beneficial compounds.

A healthy SCOBY is essential for brewing Kombucha, and by using the continuous Kombucha brewing method, it can be used to ferment batch after batch of this delicious, natural drink.
How to Split Your Kombucha SCOBY
Splitting your SCOBY is a very simple process that requires some clean hands and basic equipment.
You'll need:
- Your existing Kombucha SCOBY
- A clean bowl / plate
- A clean glass jar or container with a wide mouth
- Starter liquid (more on this below)
- Clean breathable lid (something like kitchen roll and a rubber band)
Step 1: Prepare Your SCOBY
Before splitting your SCOBY, make sure it's healthy and active.
Also make sure you have grown enough SCOBY to share, it is great if you have layers which seem to be naturally separated from each other.
If your SCOBY is looking a bit shrivelled up, or hasn't been used in a while, it's a good idea to refill your Kombucha brew with sweet tea and then split the SCOBY once that batch of Kombucha is ready.
Step 2: Prepare Your Starter Liquid
To split your SCOBY, and create a new starter culture for your friend, the most important part to give them is actually the starter liquid, which is simply your Kombucha, this is absolutely crucial to kickstart the fermentation.
A rule of thumb minimum (info taken from the rest of the internet) for the starter liquid is 10% of the amount of sweet tea they will add to the mix. So for example, if your friend will brew 2 Litres of Kombucha, they'll need 200ml of starter liquid. But it isn't really that simple (this is where it gets (very slightly) scientific).
10% starter liquid ratio to sweet tea will work fine to kickstart the fermentation of a new brew, as long as the pH is between 2.5 to 3 (very acidic Kombucha that's actually more like a vinegar), but it takes more time to bring the pH of the liquid down to this (3-4 weeks fermenting time).
In actual fact, the pH of the Kombucha you will probably provide will likely be between 3 and 4.

To start a new brew successfully with a ratio of 10% starter liquid, we recommend leaving your new SCOBY, with its starter liquid, to sit at room temperature, with a breathable lid and give it 2 - 3 weeks to ferment. It will develop a strong vinegar smell, and will be powerful enough to kickstart their own brew, but our friends will have to be a little patient.
To bypass this extra waiting time, there is another option!
By giving your friend a minimum of 20% starter liquid to the amount of tea they will ferment, you can give them enough power to get started.
So for example, if they will make 2 litres of Kombucha, they will need around 400ml of your Kombucha. This extra liquid makes up for the slightly higher pH.
If you are interested in measuring the pH, you can do this with cheap pH strips, or more expensive digital readers, I also find measuring the brix (sugar percentage) of my Kombucha super interesting, but that isn't very important here.
Add the relevant amount of liquid into a clean glass jar or container, which you will give your friend.
Step 3: Split Your SCOBY
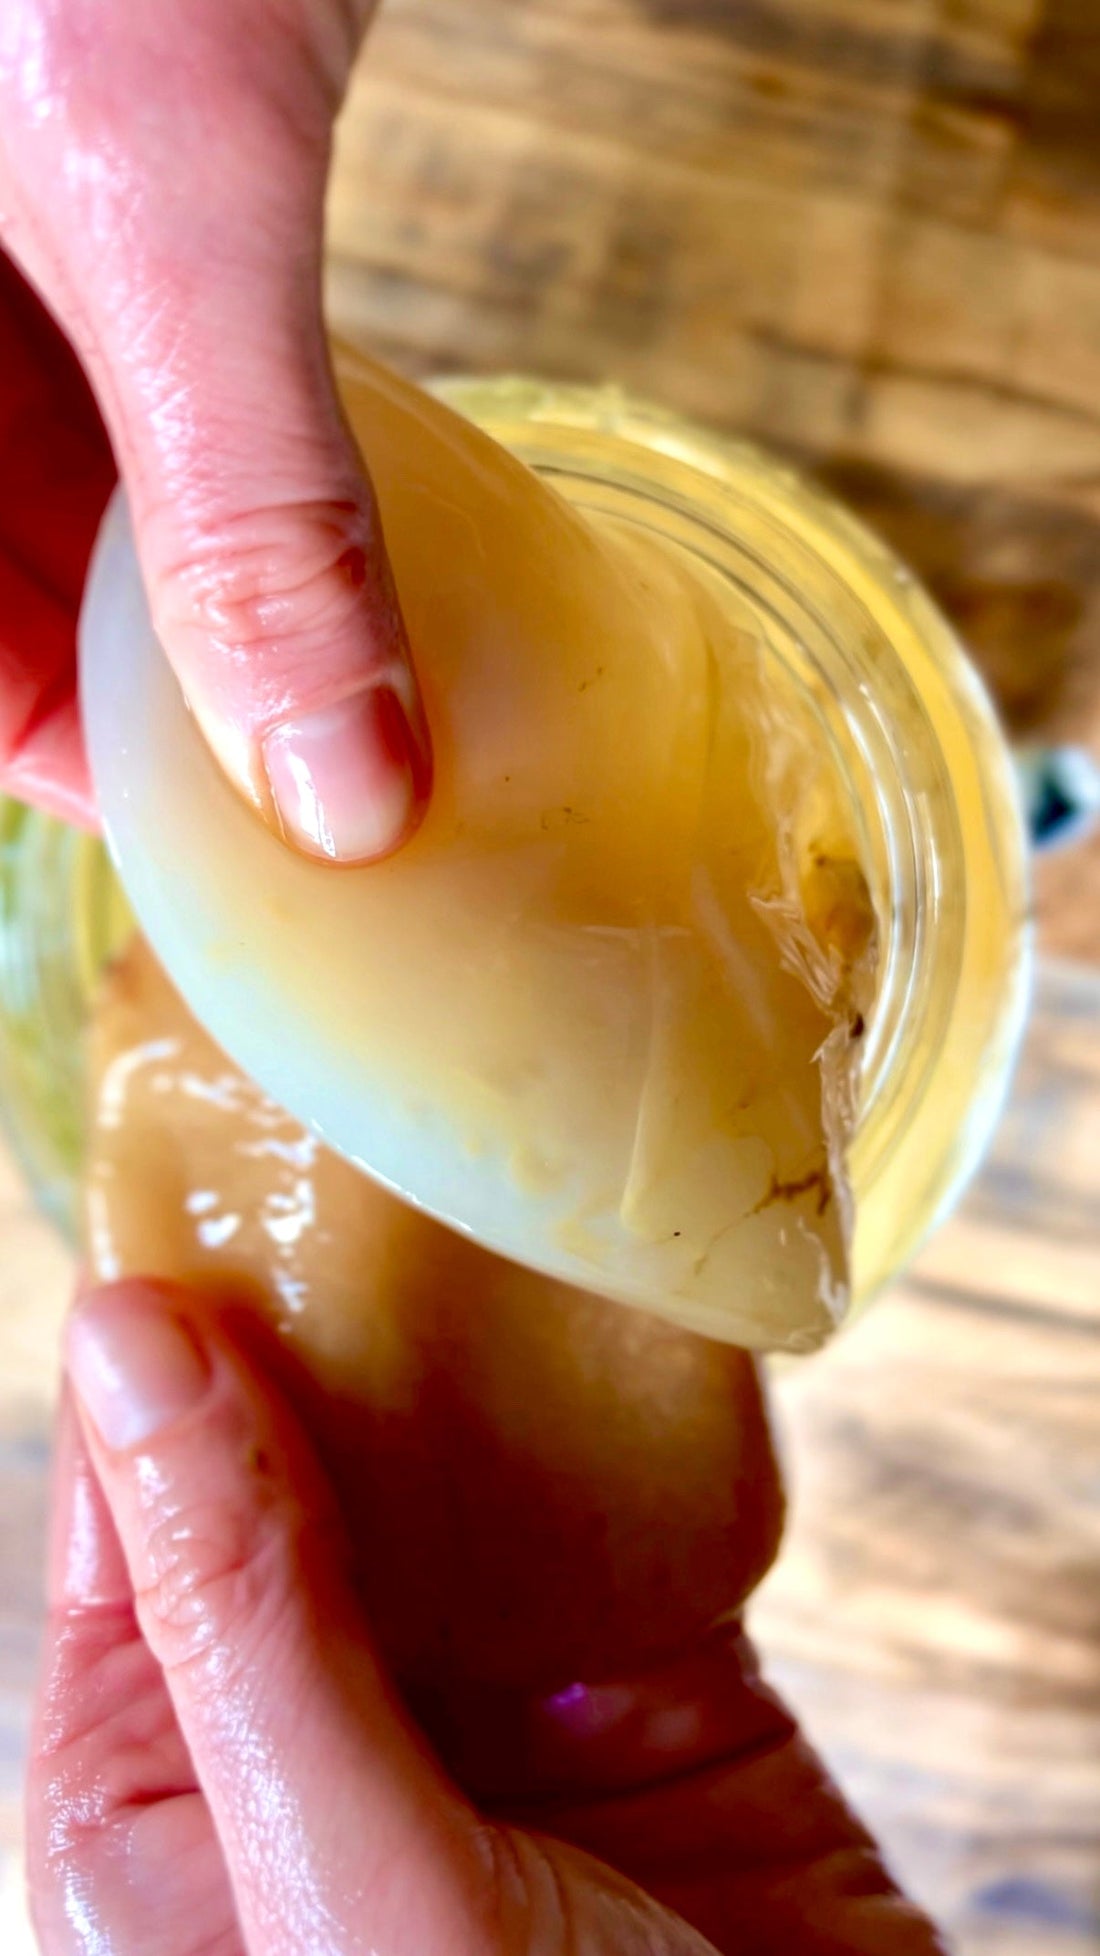
Using clean hands, with jewellery removed, gently lift your SCOBY out of its container and place it on a clean bowl / plate.
You should have white-ish layers growing on the top, and darker ones growing below. Peel away one clump / layer from the darker ones / bottom ones if possible, and add this into the container, with the starter liquid, which you will give to your friend.
It doesn't actually matter how much SCOBY you give them (but make sure that the starter liquid can keep your SCOBY submerged). It also doesn't matter if the SCOBY is broken / misshapen, as your friend will grow their own one, to the shape and size of their Kombucha jar, once they're brewing.
Add the layers / clump of SCOBY you will keep back into your own Kombucha jar. Don't worry if it sinks, it may bubble back up in a few hours by themselves, or you can try to adjust it to the top of the brew, but it also doesn't matter if they just float about at the bottom. You'll grow your new SCOBY layers on the top as before.
Step 4: Looking After The New Culture
Cover the mouth of the jar you will give to your friend with clean breathable lid, making sure its tight around the edges, and so safe from flies and dust.
This will allow the SCOBY to breathe, and to stay active.
We recommend that you keep the new SCOBY at room temperature for 7 days, before handing it over to it's new home. This will help bring the pH down a little, and you can check it's looking healthy before handing it over ready to be used.

Step 5: Give the New SCOBY to Your Friend
Congratulations! You have created a healthy, thriving new SCOBY to share with your friend.
When the time comes, simply give them their SCOBY and starter liquid, with some basic instructions on how to brew their first batch of Kombucha (we have linked our FREE Beginners Guide To Making Kombucha Here).
Make sure to share our Kombucha Recipe Club and Instagram page for non-stop recipes, tips and tricks and Kombucha brewing fun.
By following these simple steps, you can easily split your Kombucha SCOBY and share the love with friends and family.
Happy brewing!