

If you're here because you'd love to start brewing your own Kombucha, but keep on hearing horror stories about glass bottle explosions being an inevitable part of the process, we're here to tell you this is something you can prevent (and we have the best rated range of Kombucha Starter Kits to get you brewing safely, here).
If you’ve ever brewed Kombucha at home, you might know the excitement of finally tasting your tangy, fizzy creation.
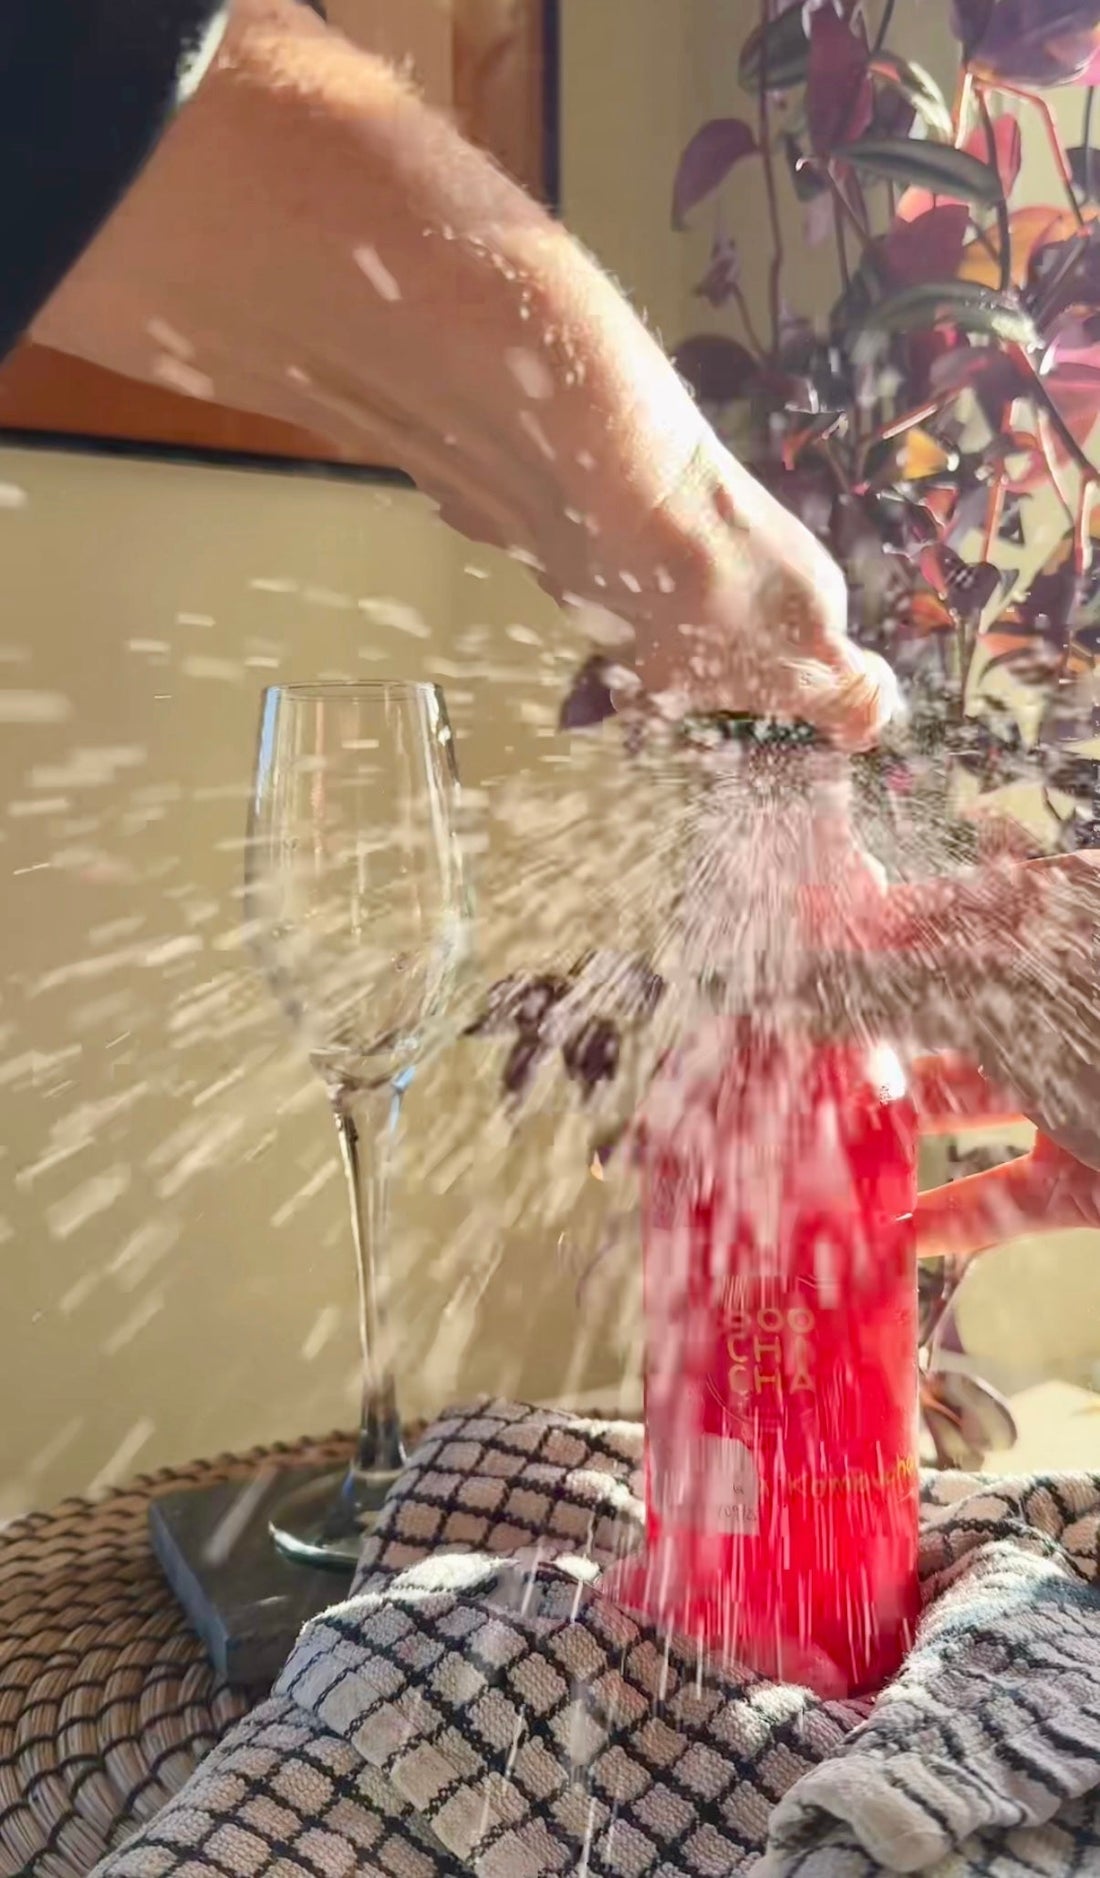
However, some Kombucha home brewers might know the shock of opening the cupboard to find bottles cracked, lids popped, and their beloved Kombucha sprayed everywhere, but this is something that can be avoided with the right knowledge.

In this post, we’ll explore exactly why Kombucha bottles explode, how to stop it from happening, and how to safely flavour and make your Kombucha fizzy without risking injury, mess or wasting your brew.
We’ll also share some simple recipes for the most popular Kombucha flavour combinations, such as ginger, raspberry, and lemon.
Why Do Kombucha Bottles Explode?
At its core, Kombucha is a fermented drink made by adding a SCOBY (symbiotic culture of bacteria and yeast) to sweet tea, and leaving it to ferment at room temperature for 7-10 days normally.
During fermentation, the yeast eats sugar and produces alcohol and carbon dioxide (CO2). The live bacteria then turn some of the alcohol into organic acids that give Kombucha its slightly tarty flavour.
The important part here is carbon dioxide.
In an open jar with a breathable lid, most of the CO2 escapes. This stage is typically referred to as the first fermentation, and many people enjoy their Kombucha straight after this stage, especially if they add new and fun flavours using our huge range of Kombucha Brew Bags.

Secondary fermentation begins once you bottle your Kombucha, add an air tight seal / lid, and continue to store at room temperature rather than refrigerated. The CO2 produced in this stage stays in the bottle and diffuses back into the Kombucha, giving it a totally natural fizz.
Usually it takes between 2 - 5 days to get a nice build up of fizz (we have a full blog here on making your Kombucha into a champagne replacement). The more residual sugar, or sugar added as flavourings (in the form of fresh fruit or simply extra sugar) the faster the build up of CO2 will be (warmer temperatures will also speed the fermentation up, just the same as it does in the first fermentation too).
The sugar is an additional source of fuel for the live bacteria and yeasts, and when stored at room temperature the fermentation will continue and to put it simply, the more fuel (sugar) left to consume, the more CO2 will be produced.
Eventually pressure will build up in the bottle. If this stage goes on for too long, or the bottle isn’t strong enough, the high pressure could cause a bottle explosion.
Only live bottles of Kombucha come with this risk, which is why when you are shopping for an authentic Kombucha, always get one which must be refrigerated (otherwise there's no way it could be live, and you now understand why).

If fizzy Kombucha isn't on your to do list, just pop your bottled Kombucha straight into the fridge, because that pretty much pauses the fermentation and so very minimal amounts of CO2 will get built up inside the bottles.
Besides being messy, exploding bottles can be dangerous. Glass shards can fly across your kitchen, and cleaning Kombucha off the walls is no one’s idea of fun.
Some home brewers learn the hard way and then switch to safer practices. Luckily, you don’t need to give up fizz to stay safe.
How To Stop Kombucha Bottles Exploding
- Use the right bottles: not all bottles are created equal. Thin glass jars or some recycled water bottles can’t handle the pressure of carbonation. The best choice is thick glass swing-top bottles, often used for beer brewing. These are designed to withstand higher pressure. Avoid cheap decorative bottles that aren’t rated for fermentation (check out of our range of fermentation safe accessories here). we have also had a great success and made very fizzy Kombucha in our Mini Bottles with plastic caps (more on that here)
- Don’t overfill: leave at least 2–3 cm of headspace at the top of your bottles. This gives the CO2 a bit of room to expand without putting all the stress on the glass
- Control sugar levels: more sugar means more food for the yeast, which means more CO2. If you’re adding fruit juice, whole fruit, or honey for flavour, you need to keep this in mind. The sweeter your flavourings, the faster pressure will build
- Store at the right temperature: fermentation speeds up in warm conditions. If your kitchen is hot, bottles will carbonate faster and pressure will rise quickly. Keep them in a cooler cupboard, and check our extra safety storage tips below
- Burp your bottles: burping means opening the lid slightly once a day to release gas before resealing it. This is especially important if you’re new to this stage and aren’t sure how quickly your Kombucha carbonates yet
- Refrigerate once it’s fizzy: cold temperatures slow fermentation almost to a halt. Once your Kombucha has reached the level of fizz you like, put the bottles in the fridge to stop further carbonation

How To Safely Flavour & Fizz Your Homemade Kombucha
Flavouring your homemade Kombucha is really fun, it's a great way to get probiotics, antioxidants and organic acids into fussy teenagers, toddlers and husbands, and not something to shy away from.
The second fermentation is when we add fresh fruit, additional herbs or spices, or simply fresh juices to give your drink more personality and add extra carbonation.
Here’s how to get some fizz safely, and avoid the risks of exploding Kombucha bottles!
- Start with properly fermented Kombucha. Only flavour once the first fermentation is done. At this stage, the tea should taste tangy, tart, and just slightly sweet, if you need help with this part check out our famous Kombucha Starter Kits.
- Choose your flavourings. Fresh fruit, fruit purée, juice, herbs, ginger, and spices are all popular, check out Our Kombucha Recipe Club for lots of ideas.
- Bottle your recipe. Pour your Kombucha into fermentation safe bottles (we have the perfect ones here), add your flavourings, and seal tightly.
- Short second ferment. Leave bottles at room temperature for 2-5 days. Burp them daily to avoid explosions. The sweeter the flavouring (the more sugar), the less time needed to get a good fizz in the second ferment.
- Refrigerate. As soon as it’s fizzy, pop bottles in the fridge to slow fermentation and prevent more sugar turning into CO2. This stage also calms the bubbles down so when you do open it, it doesn't explode everywhere.
How To Make a Kombucha with a Small Amount of Fizz (Without Risk)
Most people enjoy their Kombucha lightly sparkling rather than aggressively fizzy. If you want a gentle bubble without the fear of over-carbonation, here are some tricks:
- Add less sugar or fruit during flavouring. The less fuel for yeast, the less fizz. You could even just add your plain Kombucha without any flavourings to a sealed bottle, the residual sugar will create a lovely gentle fizz
- Just do a short second fermentation of 1–2 days, and then refrigerate
- Use plastic bottles occasionally. While glass is better long-term, plastic makes it easy to test pressure. Squeeze the sides: once the bottle feels firm, it’s ready for the fridge

Our Extra Safety Tips
- Place your secondary fermentation bottles in a reusable shopping bag / plastic box with some kind of lid just in case of an explosion. This will catch the glass and the liquid to minimise mess and clean up time, a cool box or Lidl reusable shopping bag works great here
- Use glass bottles with reusable plastic corks (we have the perfect mini series here) in the top as if the pressure gets too high, the cork will pop out itself (you will probably lose most of the fizz if this happens). You could also use plastic screw on caps which will flex to contain the building pressure
- Always use caution when opening bottles. Open them over the sink, or a bowl, with a bag over the top, and always point them away from your face
- Do not forget about your bottles! Leave a reminder on your phone or on a note on the fridge to check the bottles daily
- If in doubt, refrigerate early. You can always let a bottle sit out later to build more fizz, but you can’t fix an exploded bottle
Popular Kombucha Flavour Combinations
Here are a few simple and popular flavour combinations you can try at home. If nothing here takes your fancy, take a look through our huge Kombucha recipe club.
Ginger Lemon Kombucha
Add 1 litre finished Kombucha, 2–3 cm fresh ginger root, peeled and grated (or 1 teaspoon of ginger powder) with the Juice of 1 lemon to your bottle. Seal, and leave somewhere at room temperature to ferment for 2–3 days before refrigerating.
This creates a refreshing, slightly spicy fizz similar to ginger beer (is a great one for 'people who don't like Kombucha').

Raspberry Mint Kombucha
Add 1 litre finished Kombucha, a handful of fresh raspberries and a few sprigs of fresh mint to your bottle. Seal and leave to ferment for 2 days and refrigerate.
The flavour is fruity and cooling, and the colour a beautiful pink.
Apple Cinnamon Kombucha
Add 1 litre finished Kombucha, 150 ml apple juice and 1 cinnamon stick to your bottle. Seal and ferment for 2–3 days. This flavour is especially popular in autumn and tastes like spiced apple cider.
Blueberry Basil Kombucha
Add 1 litre finished Kombucha, a handful of blueberries gently crushed (fresh or frozen) and 2–3 fresh basil leaves to your bottle. Ferment 2–3 days, then chill.
This is an aromatic and modern flavour, with a fab colour, and often found in cafés.
Strawberry Lime Kombucha
Add 1 litre finished Kombucha, with 4-5 fresh strawberries, chopped and the juice of 1 lime to the bottle. Seal and ferment 2-3 days.
Refrigerate and enjoy a tangy, summery taste.

Kombucha explosions can be alarming, but they’re completely avoidable with the right practices. By understanding how carbonation works, choosing the right bottles, burping regularly, and refrigerating at the right time, you can enjoy safe and delicious brews.
Flavouring is where your homemade Kombucha really shines, and by following these simple tips and tricks, you can create everything from spicy ginger brews to fruity summer flavours without fear of dangerous mess.
If you're ready to get crafting your own healthy, fizzy drinks at home, check out our famous Kombucha Starter Kits here.